Step-by-Step DIY Cherry Nail Art at Home (Easy Tutorial)
Learn how to create trendy DIY cherry nail art at home! Follow this easy step-by-step tutorial for stunning nails in minutes. Includes product recommendations in the post description.
Dodge Island Drive
3/19/20252 min read
Step-by-Step DIY Cherry Nail Art at Home (Easy Tutorial)
Why Cherry Nails are the Hottest Trend of 2025
Cherry nail art is taking over social media platforms like Pinterest and Instagram in 2025. This stylish manicure blends playful charm with a chic, trendy aesthetic. Best of all, you can recreate this popular look right at home, saving time and money on salon visits.
What You'll Need for DIY Cherry Nail Art
🍒 Red Nail Polish – Essie Cherry Polish
🍒 White or Nude Base Polish – OPI Alpine Snow
🍒 Green Nail Polish – OPI Stay Off The Lawn
🍒 Dotting Tools or Toothpicks – Dotting Tool Set
🍒 Top and Base Coat – Seche Vite
🍒 Cherry Nail Decals (optional) – Etsy Cherry Decals
Step-by-Step Cherry Nail Art Guide:
Step 1: Prep Your Nails
Start with clean, dry nails. Trim, shape, and apply a base coat to protect nails and ensure your manicure lasts longer.
Step 2: Apply Your Base Color
Apply two thin coats of a nude or soft pastel polish. Wait until fully dry to continue.
Step 3: Add the Cherry Designs
Using your red polish and dotting tool, carefully place small pairs of dots on your nails to represent cherries. Vary their placement for a playful look.
Step 4: Draw Cherry Stems & Leaves
Using a thin brush or dotting tool, gently paint small green stems and leaves above each cherry.
Step 5: Seal Your Nail Art
Once fully dry, apply a glossy top coat to seal your art and ensure longevity.
Step 6: Alternative Method – Cherry Decals
Short on time? Apply cute cherry decals or stickers directly to your base color and seal with a top coat.
Trending Cherry Nail Art Styles to Try
Classic Cherries: Minimal cherries on nude nails.
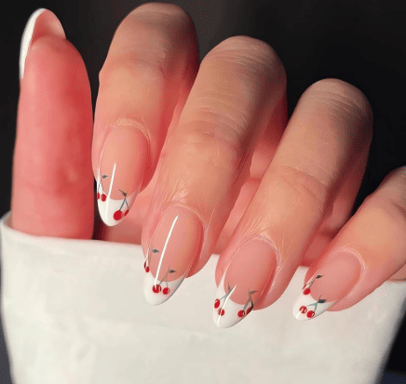
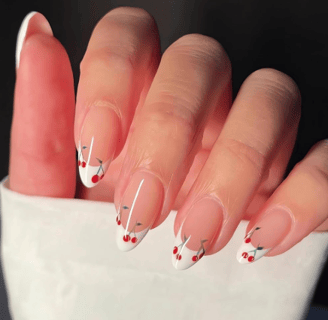
French Tip Cherry Nails: Cherry art along elegant tips.
Cherry Glam: Add glitter or rhinestones for sparkle.
Pro Tips for Perfect Cherry Nails Every Time
Always allow polish layers to dry fully before applying the next coat.
Keep a steady hand by resting it on a flat surface while applying nail art.
Clean edges with a brush dipped in polish remover for flawless nails.
Final Thoughts: DIY Your Cherry Nails!
With this easy DIY guide, trendy cherry nails are right at your fingertips—literally. Pin this guide on Pinterest to reference whenever you're ready for a fresh manicure at home!
Affiliate Disclaimer:
(This post contains affiliate links. We earn a small commission at no additional cost to you.)
Nails
Explore vibrant designs for every nail lover.
Contact:
Products
contact@dodgeislanddrive.com
© 2025. All rights reserved.